| Last Update | |
| Created | 24 March 15 |
| Products | WP Plugin,White Labels,Mobile Apps,B2B Software,Trip Composer,Corporate/Self Booking Tool |
| Documentation | Well Documented |
| FAQs | Travel API Integration,Hotels API Integration,Flights API Integration,Payment Gateway Integration |
-

HTML Template Designs
Save Time With Pre-Made HTML Templates
-

WordPress Travel Plugin
The ultimate solution to enhance your WordPress website
-

Crossplatform Widgets
Integrated travel booking features in your existing site
-

White Label Travel Portal
Predefined HTML Templates to Build Stunning Travel Websites
-

B2B Travel Software
Offer a platform to your agencies to book and sell travel services.
-

Travel Agency APP Builder
Create your own Mobile APP and host it on your Play Store.
-

Itinerary BuilderNEW
Create Amazing Itineraries. In A Few Minutes.
-

Corporate Booking Tool
Let your business travelers book and manage their trips online.
-

Travel XML APIs
Have something unique in mind? Take total control!
-

Travel Marketplace
Platform for your agencies to buy and sell FD/Series allotments.
-

GDS/OTA Solutions
Best for IATA travel agencies with direct contracting.
-

Travel Chatbot
Chatbot service offers a convenient for travelers.
-

Testimonials
Voices That Speak Our Success Story
-

Gift Cards and Loyality
Launch a Loyalty Program, Store Credit & Rewards.
-

Documentations
Key aspects of adivaha's travel technology offerings
-

Blogs
Travel Portal Solutions - Travel Technology News and Updates
-

FAQ-Frequently Asked Questions
Ask your questions here!
Setup & Installation - adivaha® WordPress Travel Plugin
Home » Documentations » WordPress Travel Plugin » Setup & Installation
Step-by-Step Guide For You to add Travel Booking feature in your WP website
- 🔥 WordPress Travon Theme, the premium compatible theme for adivaha plugins. Buy from Themeforest.net or Buy from Templatemonster.com
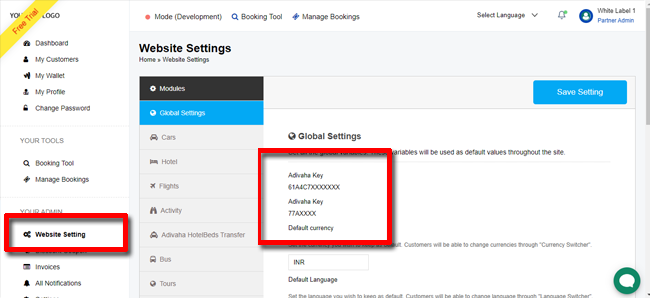
1. Login into your "backoffice" and navigate to "Website Settings". Pick the "API Key" and "Partner ID" and feed it into the WordPress plugin to connect it to our CRS.
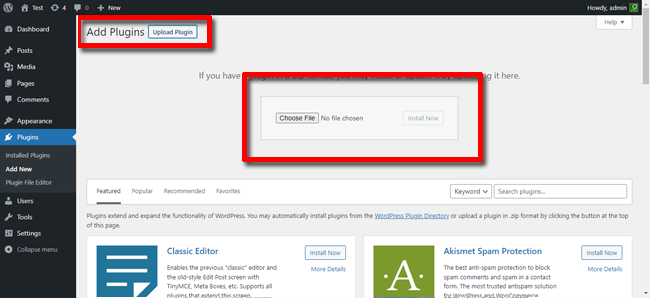
2. Login to your WordPress admin. Navigate to "Plugins" -> "Add New"

3. Click "Upload Plugin" -> upload "adivaha" plugin.
4. Click "Activate Plugin"

5. Click "adivaha® Plugin" -> Enter your "API Key" and "Partner ID" and click "Connect"

6. Use [adivaha_searchBox] shortcode to place the searchbox in the home page.
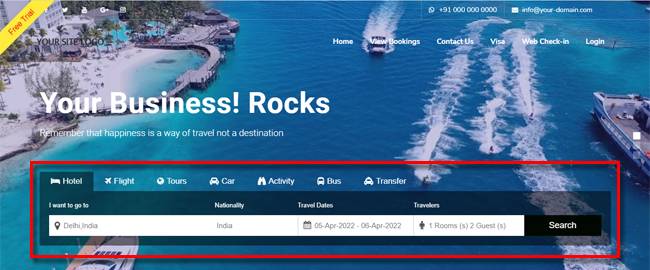
7. Create a search results "page" and put [adivaha_searchResults] in the search results page.
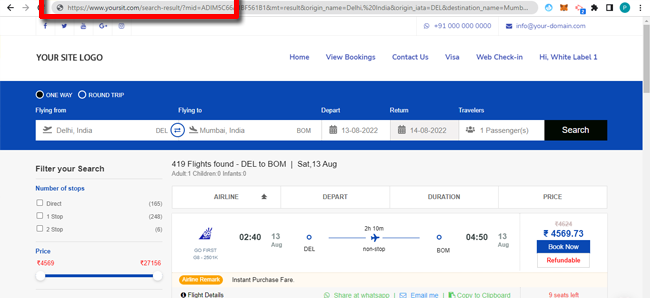
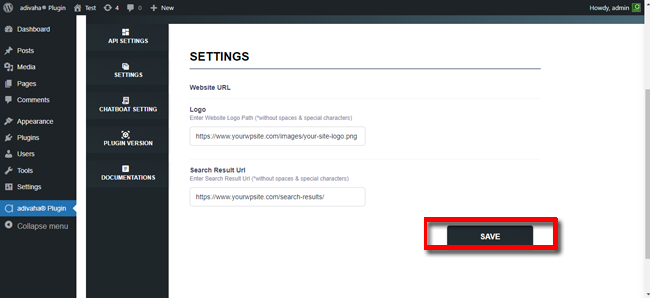
8. Feed the url of your logo and newly created search result page in the settings page ("Search Result Url") and click "Save".
